Early models of Kawasaki KZ650 similarly to their “elder” 900-1000ccm brothers (or sisters) were equipped with screw type of clutch release (or actuator). One may also call this type of actuator “worm” type. Haynes motorcycle basics techbook calls it spiral quick-thread type clutch release. In those times different bikes of different manufacturers were equipped with this type of clutch release. And no wonder that KZ650 shares pretty much the release clutch actuator’ part numbers with 750 twin and 900 and 1000 inline four models. One may even call the KZ650 clutch an “easy” version because it had longer than 750-900-1000 models’ actuator lever which made clutch operation less tiresome.
Let’s make a short explanation of how it works for those who don’t know. Here is how that screw type of ZK650 clutch actuator looks being disassembled.
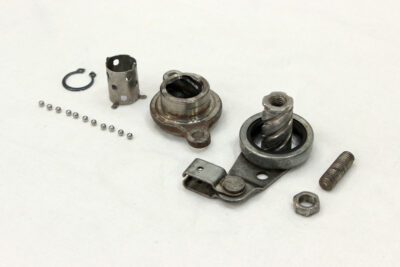 From left to right you may see: circlip, 11 balls, retainer, outer and inner parts of clutch release and adjusting screw with its lock-nut.
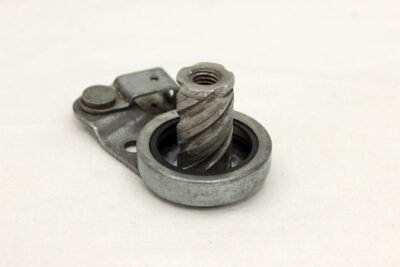
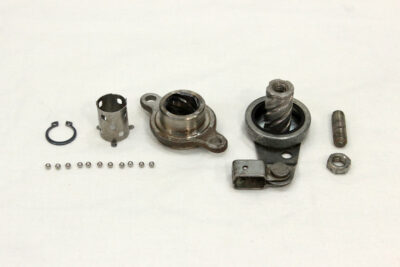 Inner part of the clutch has spiral grooves which makes it look like worm gear.
 Outer part has matching grooves.
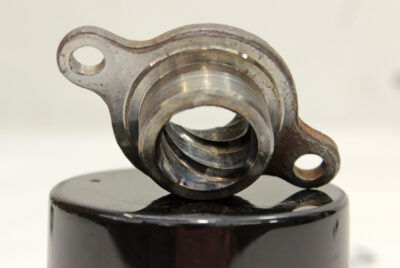 These grooves are for balls, so inner parts could be moved along the outer part with less friction between two parts. Spiral configuration of grooves converts rotary movement of clutch release arm into linear movement of clutch push rod pressed by inner part of clutch actuator. Retainer is needed to keep balls evenly positioned:
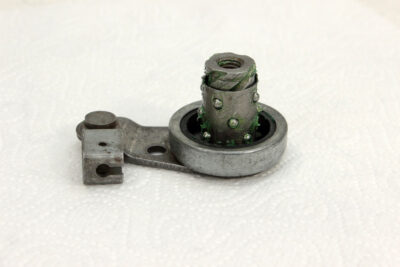 Circlip makes the system foolproof: it serves as a limiter of movement and prevents parts from unintentional separation. Adjusting screw and it lock nut serve for clutch adjusting: screw contact directly with push rod.
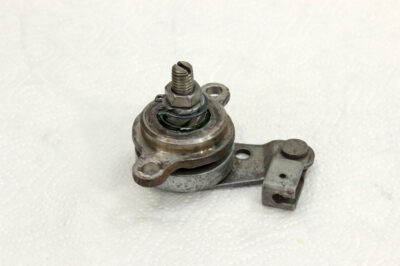 Screw (worm) type of clutch actuator was replaced with other types of actuators in the 80s. Nowadays most of Kawasaki KZ650 screw actuators are more than 40 years old (which means wear of parts and corrosion) and as supplies of original parts are not endless, it’s no wonder that one may ask him-/herself a question: if there any other option for that clutch release?
And when it came to the clutch release of our KZ650 I couldn’t avoid this question either. Clutch actuator looked pretty shabby. In addition someone already broke retainer “ears” (designed to hold it along with balls on the outer part of release) and managed to deform the circlip. Sure, I knew about potential solution since I rummaged through the list of parts provided for Kawasaki KZ-Zs by PMC. Among them PMC had the so-called “Easy clutch kit”. According to information from Webike the kit is applicable for next list of Kawasaki motorcycles:
- KAWASAKI Z1 (900SUPER4) 72-80
- KAWASAKI Z1-R/Z1-RII 72-80
- KAWASAKI Z1000 MkII 72-80
- KAWASAKI Z2 (750RS/Z750FOUR) 72-80
- KAWASAKI Z750F 72-80
- KAWASAKI Z900 (KZ900) 72-80
And even as Kawasaki KZ650 wasn’t listed among them, it was clear for me that this kit could be installed on KZ650 because the KZ650 outer part of clutch release has part number identical to those of bikes from the list. However there were questions, answers for which I could get only by buying the kit. And so I did. It took more than two weeks instead of six days to get parcel from Japan ( so-called International Priority service of Fedex).
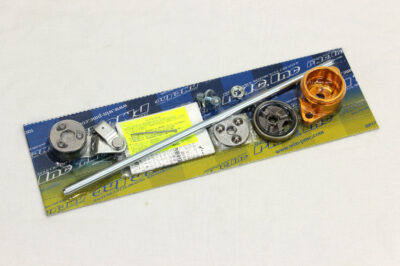
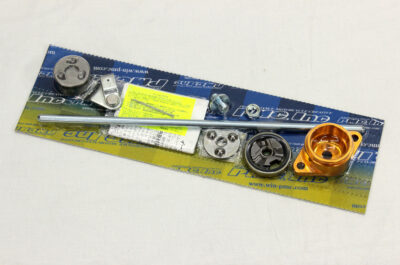 Let’s unpack parts and take a closer look at them:
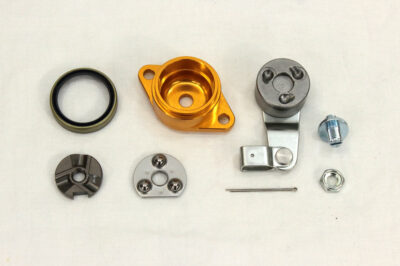
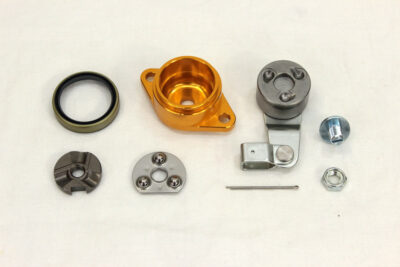 According to kit description placed on Webike: “This easy clutch kit is a innovative kit that dramatically reduces weight of Z series clutch works which was said to be impossible to improve”.
I could say nothing about reducing weights in case of KZ650, yet I have good news for those who don’t like innovation to be tested on them: with this kit you’ll get a solution well-tested and approved by Kawasaki. The thing is that the PMC easy clutch kit is a copy of Kawasaki clutch actuator of next to screw type generation. It was used in the 1980s for KZ750 (inline four), KZ550, KZ1000 LTD and CSR, later models of KZ650 and some other bikes. I am sure that this fact is well known; however, to make it absolutely clear, here is compilation of pictures of OEM Kawasaki parts (sources of pictures are: CMSNL.com and ebay.com):
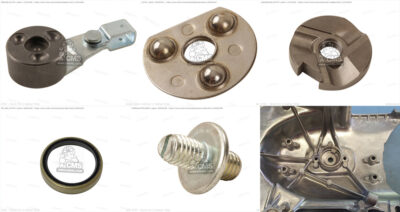 As we may see, parts’ design is similar, if not to say identical, including those of insides of actuator outer housing which in case of Kawasaki OEM solution was integrated into the sprocket cover.
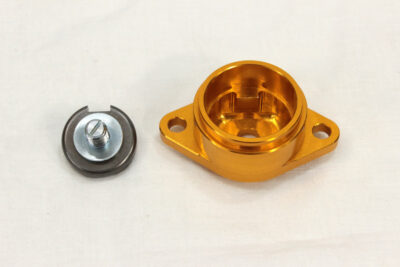 This type of clutch release known as ball and ramp type. So we could say that the PMC easy clutch kit is an update kit which allows us to install more modern clutch actuator instead of screw type actuator. Now let’s assemble it.
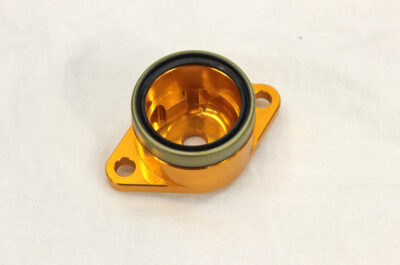
Firstly we have to install oil/grease seal on clutch release housing:
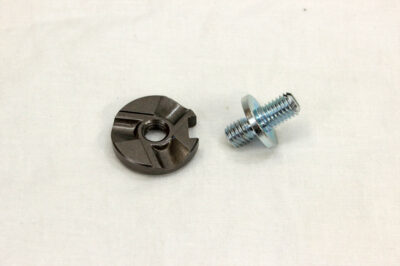
 Then screw adjuster into inner plate (also known as ball ramp plate):
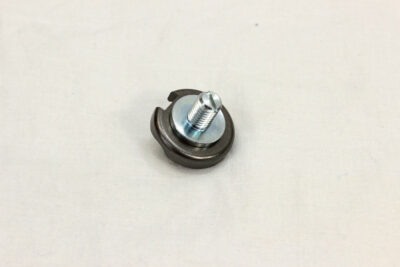 After this we could place the inner plate into the housing with a plate’ slot aligned with the guide in the housing. The guide ledge prevents the inner plate from rotation.
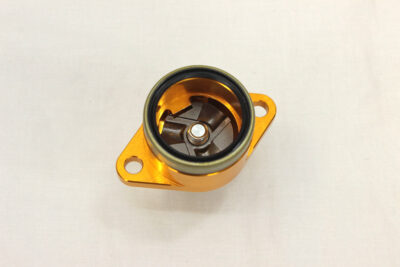 Then we could put in place balls assembly: three balls encased in a retainer. Balls have to be aligned with ball ramp plate’ dimples.
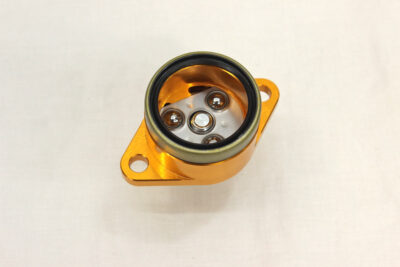 Next came an outer plate with an actuating arm which has to be put with its dimples aligned to balls.
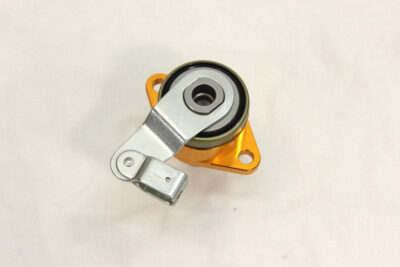 Adjuster’ lock-nut and pin for fixing the head of the clutch cable came in the set of parts.
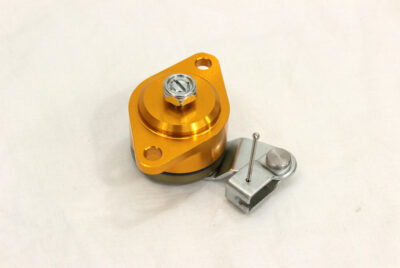 But how does it work? As you have already seen, this newer type has two plates, each with three dimples of varying depth. These dimples are made for the balls assembly that is to be placed between plates. This is just another conversion of arm rotary movement into linear movement of push rod: when one pulls clutch lever it pulls actuator lever, and so outer plate rolls on balls over the inner plate (which is fixed in casing) and as depth of dimples varies from deeper to shallower on both plates, outer plate simultaneously with turning moves away from inner plate and thus pushes the rod.
And here I have to admit that the design of this clutch actuator is less foolproof than the design of screw/worm actuator. In case when the actuator and clutch cable are not properly adjusted one may get a situation in which the outer plate will be turned too far and balls assembly rolled out of dimples. In this case the outer plate will get stuck and to return all parts in the initial positions one would need to remove the sprocket cover. However, it is only a possibility, and with properly adjusted actuator and cable it wouldn’t happen.
Meanwhile, let’s return to the question of PMC clutch actuator installation in place of old KZ650 clutch release. This actuator fits the sprocket cover perfectly (and it was expected). The lengths of the PMC actuator lever (arm) is mostly similar to that of the original KZ650 actuator lever.
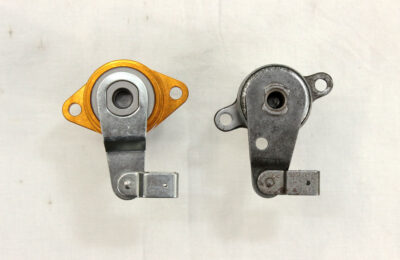 Initial position of the PMC lever is slightly different from the position of OEM lever (PMC arm is positioned a bit further counter clockwise), but I assume that in case of newer type OEM clutch actuator the position of the arm will be pretty the same.
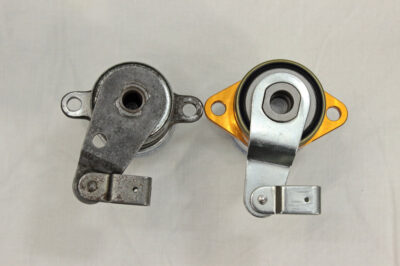 And sure, I found a couple of moments that really matter, and which one who is about to buy a PMC clutch kit for KZ650 has to know. First of them is that the PMC actuator is protruding further inside of the sprocket cover than original, thus a shorter clutch push rod is necessary. To illustrate what I mean, I put both actuators on the same plate, so they became levelled by their mating surfaces and I put studs of the same lengths in their push rod slots. Adjusting screws of both actuators I placed them in most released positions.
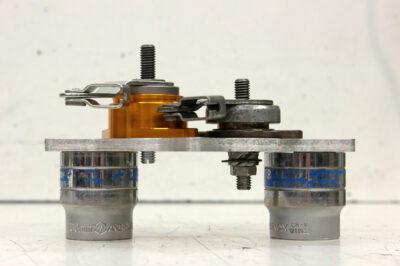 The plate on which both actuators were installed could be called “basic plane”. I made measurements and found out the position of the clutch push rod relatively to the basic plane for both actuators. In case of OEM KZ650 clutch release it is 0-7mm, in case of PMC clutch release it is 17.5-22.5mm.
But let’s check this information in the easiest way. The lengths of OEM clutch push rod 13116-021 (fist motorcycles from PMC Easy Clutch compatibility list) according to information that could be found on the Internet is 289mm. The rod from the PMC kit has lengths 274mm, which means it is 15mm shorter than original. This information corresponds pretty well with numbers I’ve got as a result of measuring.
Original KZ650 push rod has 270mm of length and both PMC and OEM rods have diameters 7mm.
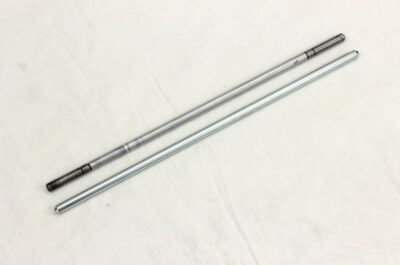
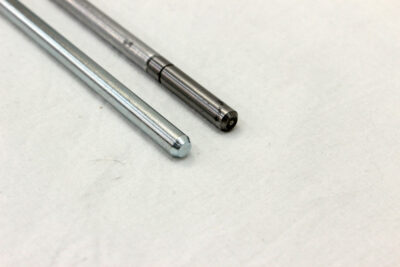 So I am about to shorten the PMC push rod to 255mm and give it a try once my engine is assembled.
But as I wrote, there are two issues. So here is the second of them. Let’s take another look at both OEM and PMC actuators placed on the same plate again. But this time I placed them arm-to arm:
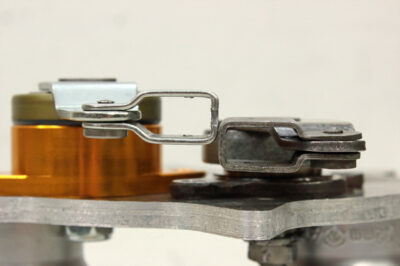 As you may see, the PMC actuator arm is positioned further from the basic plane and not even with the OEM arm. Actual difference between the positions of cable intakes is around 4mm.
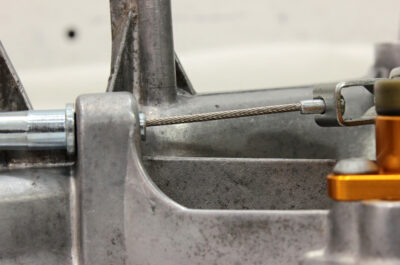
On practice this means that clutch cable will be positioned at some angle even at released position of arm, and with completely released adjuster:
 With arm pulled that angle will increase:
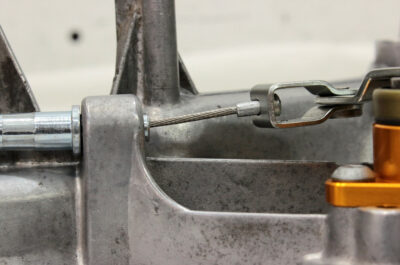 And the angle will increase even further when the adjuster screw is put in action, because it is pushing all insides of release housing further toward the engine. However, I am about to give this PMC clutch actuator a try. I’ll report the results of static testing as soon as I assemble the KZ650 engine.




I would be really interested to know how this worked out.
I’ll post additional information on the PMC clutch actuator as soon as I have time to make a testing stand and perform the testing itself.
Could you replace/make the actuator arm itself to better position the cable?
Hi,
At the moment I couldn’t answer your question since I am far from home and my workshop. Actually, I am at the frontline, fighting for freedom of my country (Ukraine) and doing my best to repel the russian invasion.
Kind regards,
Nazar