The only temporary parts I used in Eight Ball project were Kawasaki Zephyr 750 shocks. Originally they were installed on my friend’s Zephyr. Soon after he bought his bike this shocks started to leak. The reason was point of corrosion on shocks rods and in old seals made in far 1991. Usually rod corrosion means death for shocks. But I found how to fix such issue and how to prolong shocks life at least for another twenty thousand kilometres. I cleaned out corroded points by rotary tool, soldered them, polished the rods, changed seals by new ones and shocks worked well after that. Later we replaced repaired shocks, thus I’ve got this pair of shocks on shelf in my garage.
That was some eight years ago, shocks had high millage as before so after repair. I also hadn’t original shock seals at hand in those far away times so when I decided to use these shocks in “Eight Ball” project I knew that probability of their leakage was quite high. And this Spring such event has finally happened.
The leakage was very small, just oil sweating but I didn’t want to stop riding anyway so I decided to buy another pair of shocks. After some searches I bought a pair of used Zephyr 550 shocks on GB ebay. They were decelerated as “leaking/for repair” parts, but that was ok, I had intention to repack them.
And that was also a good reason to write this article.
As Zephyr 550-750-1100 shocks are typical Kayaba (KYB) dual shock so this tutorial may be useful in case of other Kayaba shocks repacking.
I didn’t shoot photos of shocks before disassembling but that’s how they looked on ebay lot page:
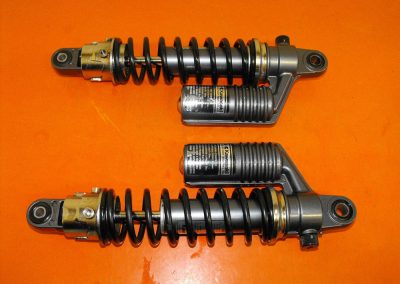
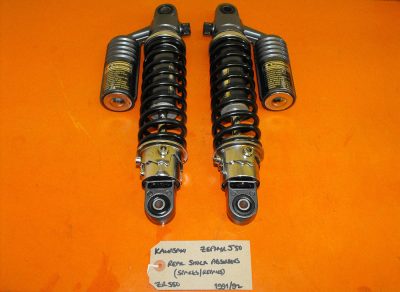 Both leaked and had no back pressure.
So let us begin the REPAIR.
Firstly we need to remove spring and adjuster. That’s obvious process and my only recommendation is to use cable ties to make it more easy.
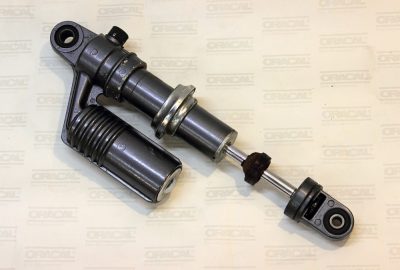 Next step is removing the air reservoir cap. If your shocks have no back pressure you may do it later, but it’s highly recommended to be made first for you own safety. Don’t try to remove cap with screw driver, it pressed very tightly and after two decades is very hard to pull it out. So we need to drill two holes in cap and then pass steel wire through them:
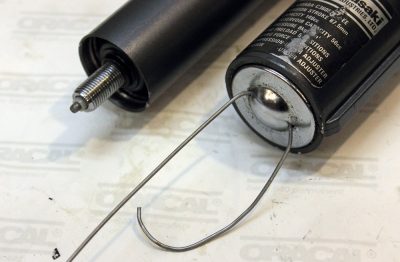 After that we can have good grip on it and to pull it out. After cap is removed we need to unscrew valve cap and air valve itself.
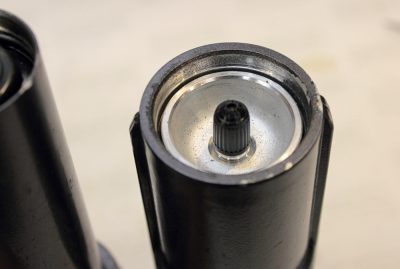 Now we are safe from getting oil on the face and on the garage ceiling.
Thereafter we may unscrew lower shock head (I prefer this method, but there is another option: after removing the rod from the cylinder you may unscrew the piston nut, previously cut off expansion on the end of the rod above the nut of course).
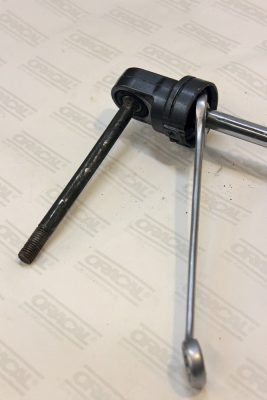 Then we shall remove shock cylinder cap. For this purpose there are special holes in Zephyr 550 shock caps. I used broken drill bit to remove caps, but if there are no such holes in your shocks caps, wide chisel will be useful tool.
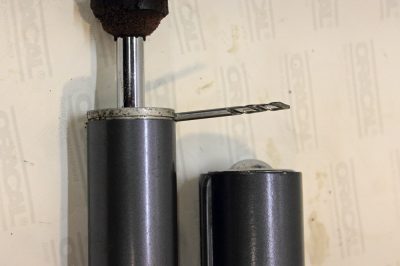 Now we could remove two circlips, which holds seal head. Upper is visible:
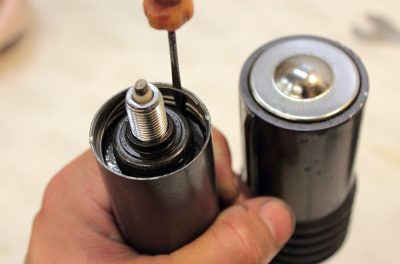 To achieve second circlip just push seal head deeper into cylinder:
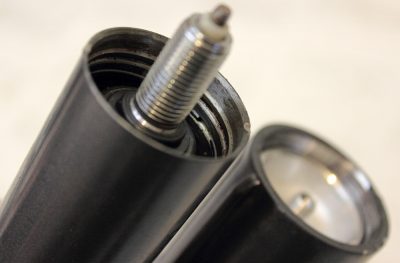 Rod with piston and seal head may be pulled out from cylinder consequently:
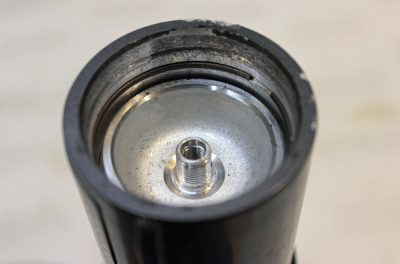
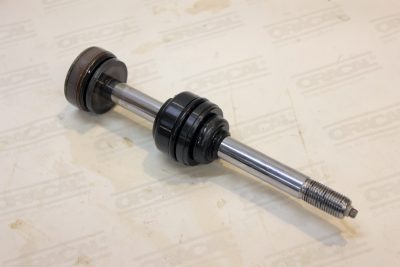 Our next point is air reservoir removing. This issue as simple as seal head removing, but after years reservoir may seat in its place tightly and you might find it difficult to push with bare hands. I don’t like idea of hammering it out in case of shocks so I used a piece of wood, wrench socket and a vise:
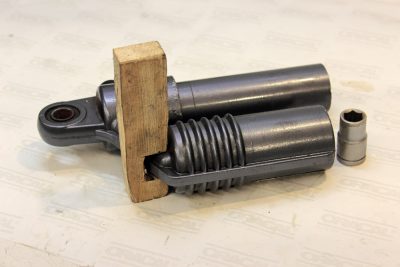
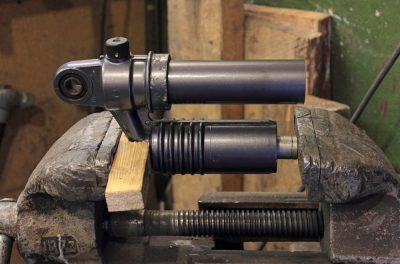 And here is a circlip we need to remove…
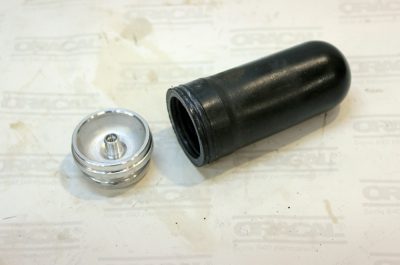 Okay. Shock is disassembled and ready to be cleaned, inspected and repacked.
As a matter of fact, if rod has no damages and upper and lower bushing are intact, the further repair may be reduced to mere changing of seal, oil and maybe dust seal.
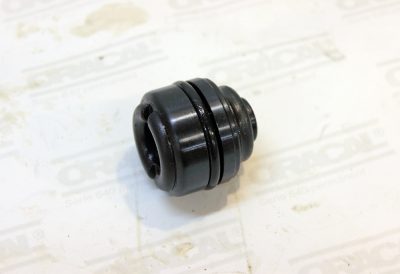 To remove seal in seal head we need to make next steps:
To remove upper rubber from seal head:
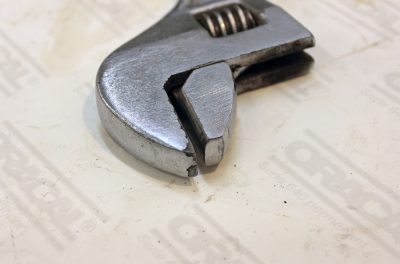
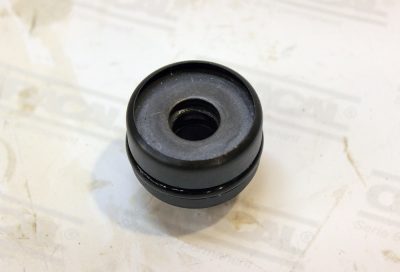 And to unroll rolling. I used a little bit modified old adjustable wrench to do this:
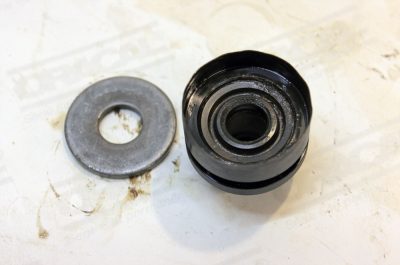 Now we can remove washer and seal itself.
The dimensions of seal are 12.5x27x5. It also could be found on ebay and in shops as KYB 12.5 seal.
Assembling of seal head is invert to disassembling. The rolling may be restored with help of hammer and wrench socket:
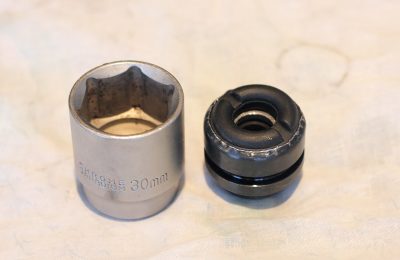 But this time I preferred to choose another way…
To be continued.



I like your very well detailed explanation of the shock rebuilding process. Great photographs as well! I am thinking of fitting my 76 Suzuki RE-5 with better shocks than its stock shocks. The Zephyr shocks might be a good option since they have adjustable rebound, compression and preload. (I will need to machine a clevis lower mount though)
I’m not sure which of the 550 or 750 Zephyr shocks would be a better fit for my RE5.
Can you tell me what the total uncompressed length between its two mounting bolts are? And if you know the stroke length that would also be very useful.
Thank you!
Hi!
Thank you for good words!
As far as I remember Zephyr 550 and 750 shocks have around 345-350 mm of length (eye to eye). GSX1400 shocks have 330mm from eye to eye, but GSX is a heavy bike so springs will be too stiff, especially considering mostly vertical orientation if shock on your bike. I used GSX1400 shocks in my Cb750 Seven Fifty project and I was forced to replace original springs and hydraulic preload adjusters with Honda CB400 Super Four springs and Zephyr 750 mechanical adjusters (both pair of shocks are Kayaba) to get right suspension sag.
Kind regards,
Nazar
Hi
Great write up
Can you please let me know the fluid capacity of each shock
Hi Gary,
I bought 1l can of shock oil but I didn’t measure exact capacity of oil per shock. The method I used to fill the shocks I described in next part of article:
https://www.gazzz-garage.com/2016/07/12/zephyr-kayaba-rear-shocks-repairrepack-part-2/
Kind regards,
Nazar
Hi Nazar, I got the same chocks with similar issues. I love your detailed repair manual, thanks for that.
In the beginning you mention removing the springs which is pretty straight forward… I have to admit not for me unfortunately. Could you give me some advice? My guess is I should make the spring as small as possible, remove the m5 inbus screw and try to move the inner spring adjustment bushing to the spring direction… but before I start hitting it (with a tool I probably make) is this correct? The aluminium surrounded by the inner bushing is somewhat corroded on my springs…
Thanks a lot!
Hi Matthijs,
In case of Zephyr 550 shocks, if you have no spring compressor tool try to do it in this way:
– Install spring preload adjuster into position of maximum preload.
– Fix spring in compressed position with several large plastic cable ties and try to compress spring farther by tightening ties.
– Install spring preload adjuster into position of minimum preload.
– Push inner cylinder of preload adjusting system toward spring.
– There is retaining circlip under it. Remove it.
– Pull preload system and spring from shock body.
Kind regards,
Nazar
Thanks!
I ended up making a tool because brute force only did hurt my thumb…
https://lion-e.nl/wp-content/uploads/sites/5/2019/03/zr550shock-tool.jpg
The shocks are a bit rougher than yours.
https://lion-e.nl/wp-content/uploads/sites/5/2019/03/zr550shock-tool-corrosion.jpg
The tool also saved me some zip-ties 😉 Thanks again for pointing me in the right direction.
Cool tool!
You are welcome:-)
Hello, I’m really impressed by your work! I try to fix my rear shocks from Zephyr. I have one problem -remove spring and adjuster it’s not obvious for me 🙁 could you help? how to do it? I unscrew little bolt (M5, allen) from adjuster and squeezed the spring by special tool – all parts of the adjuster are motionless.
PS. I know – my english isn’t good. Sorry for this.
Hi Alan,
There is a retaining circlip under inner cylinder of preload adjusting system. Push those cylinder upward and remove circlip. If preloader bushing does not move, it is likely it stuck on aluminium oxidations, rust and dirt. Use penetrating oil spray to release preloader cylinder.
Kind regards,
Nazar