
For intro I couldn’t, but quote myself:
If you tap “cafe racer” in google or another web search engine’ search line, you may find a lot of pictures of subject bikes without any kind of chain guard. But in my opinion chain guard is very important part of a motorcycle.
I can even put up with riding fenderless motorcycle in rain, but couldn’t afford idea of chain lubricant on my bottom, and all over my back. And whatever ultimate cafe-racer you build, chain guard is not such a loss in design, and gain in weight to make a bike without it. So chain guard is present in all my projects.
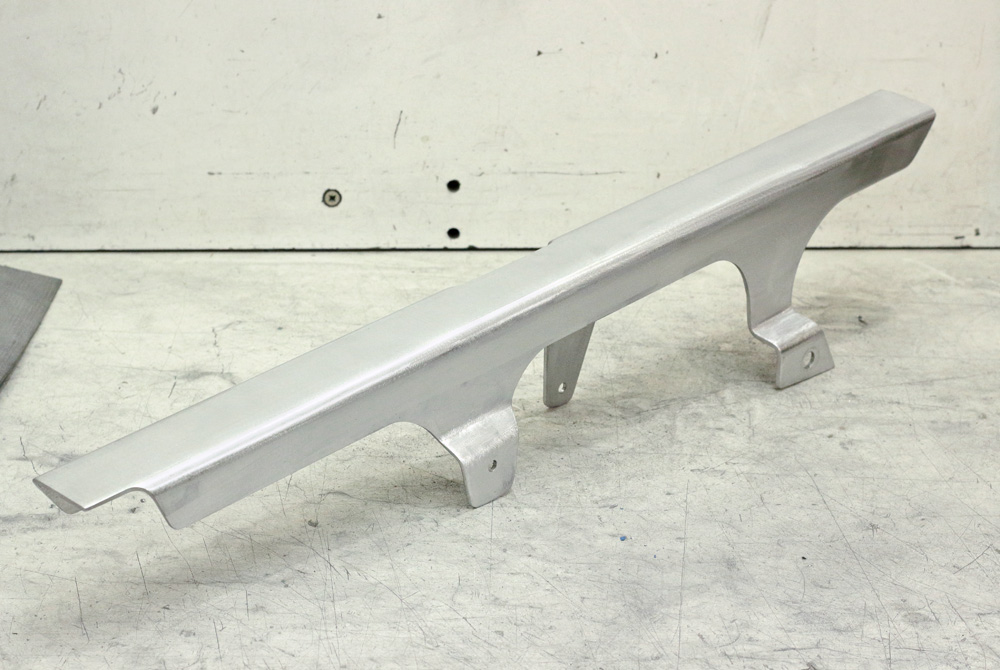
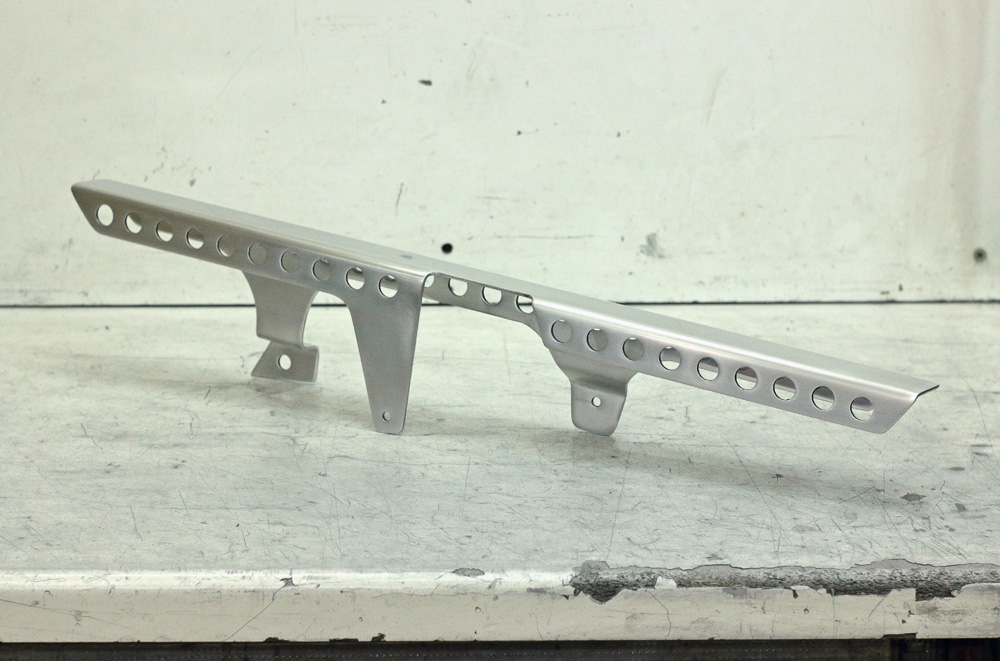
That’s a quote from my post about Honda CB815 chain guard and for Kawasaki KZ650 cafe-racer I thought out chain guard of similar design. Thus, I suppose I already could call it Gazzz Garage traditional design. And as with CB815 chain guard I started from bending 3mm aluminum sheet into U-shaped profile.
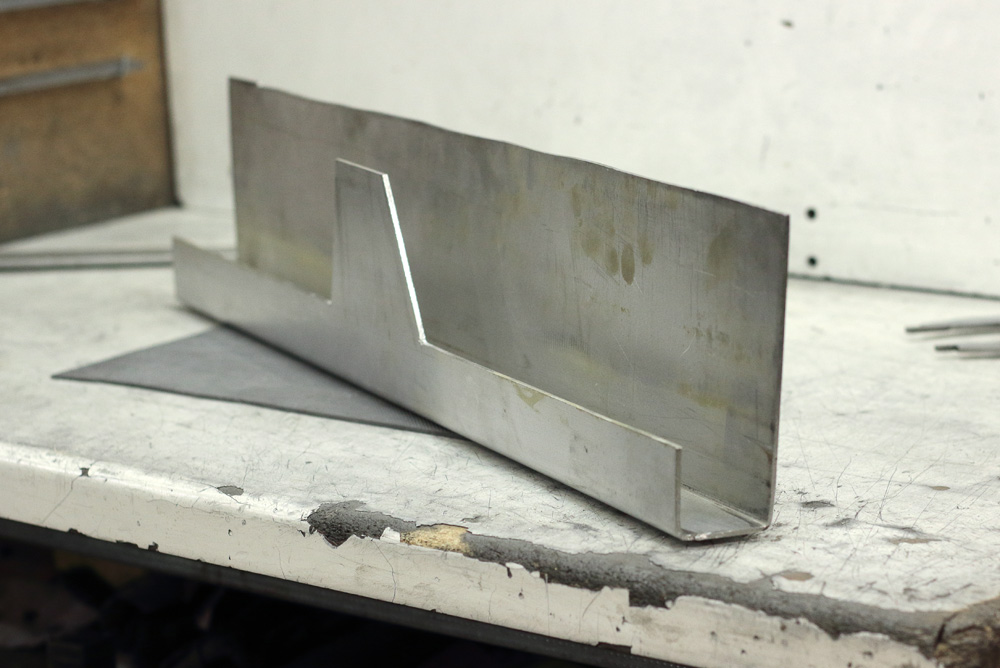 Then I made some marking, cutting as well as additional bending. Result began to resemble chain guard.
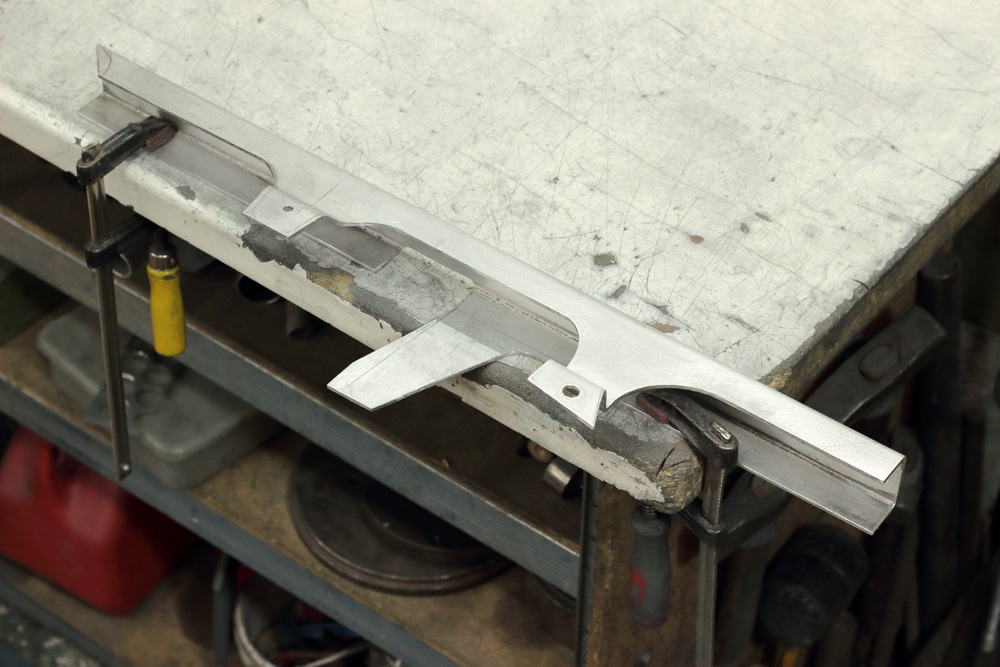
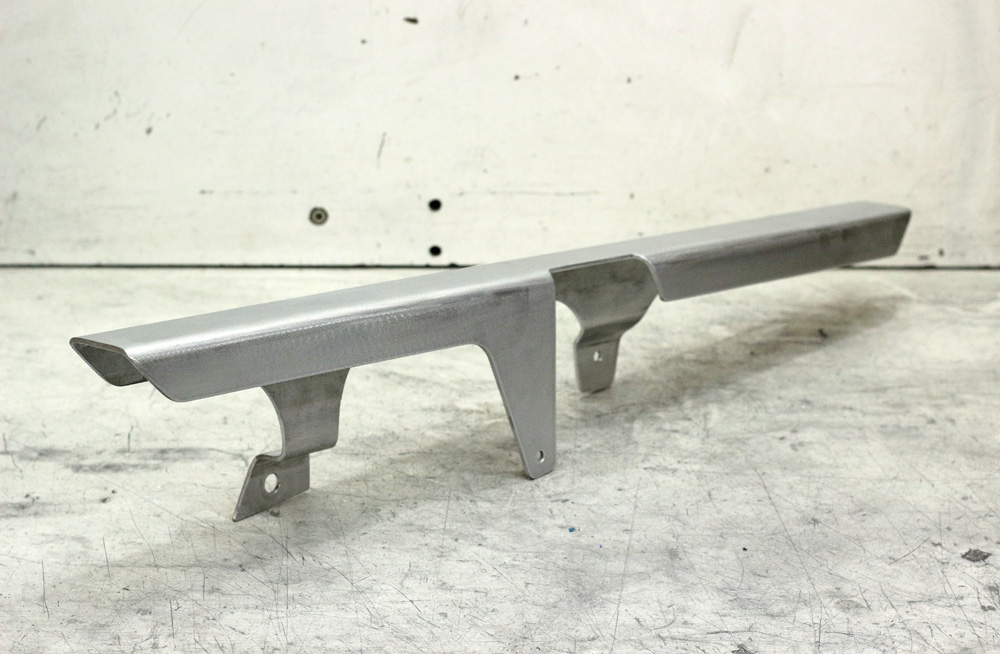
 Once all dimensions, openings and cut-outs were determined and made…
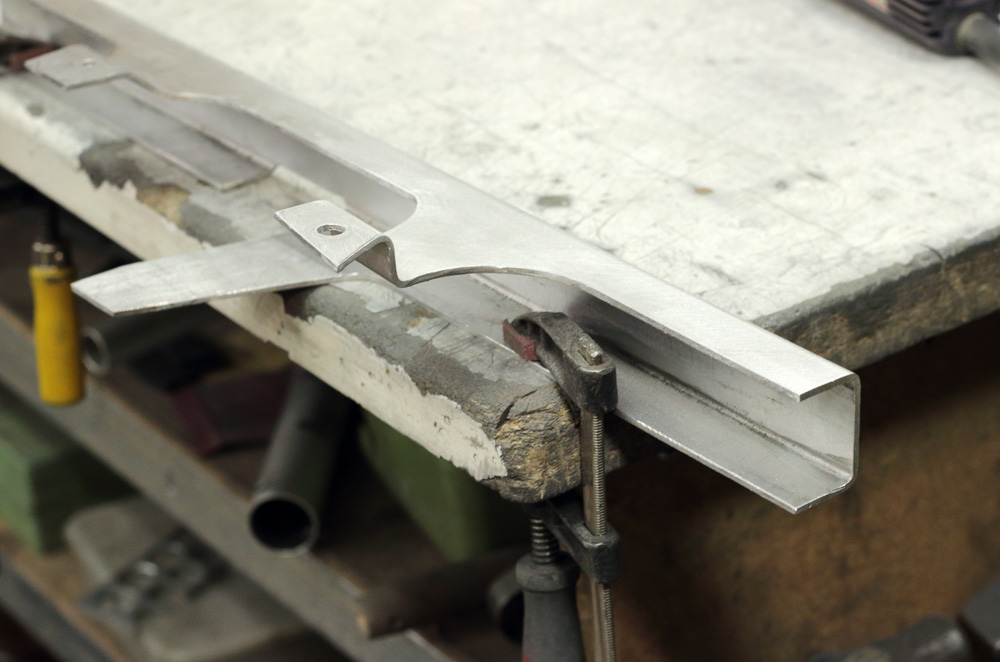
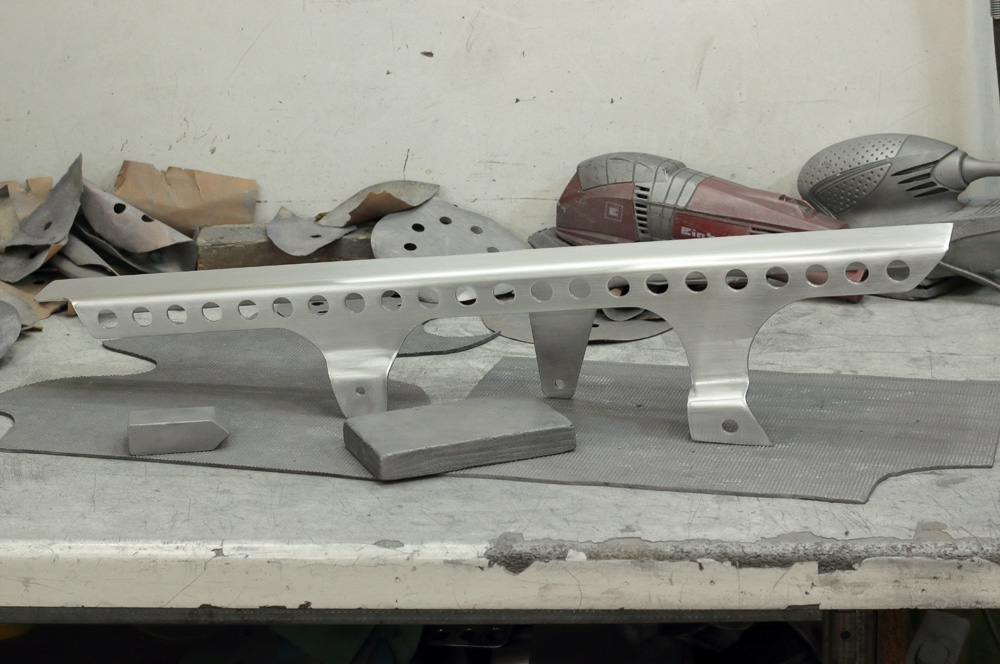
 … I switched to new task: holes drilling.
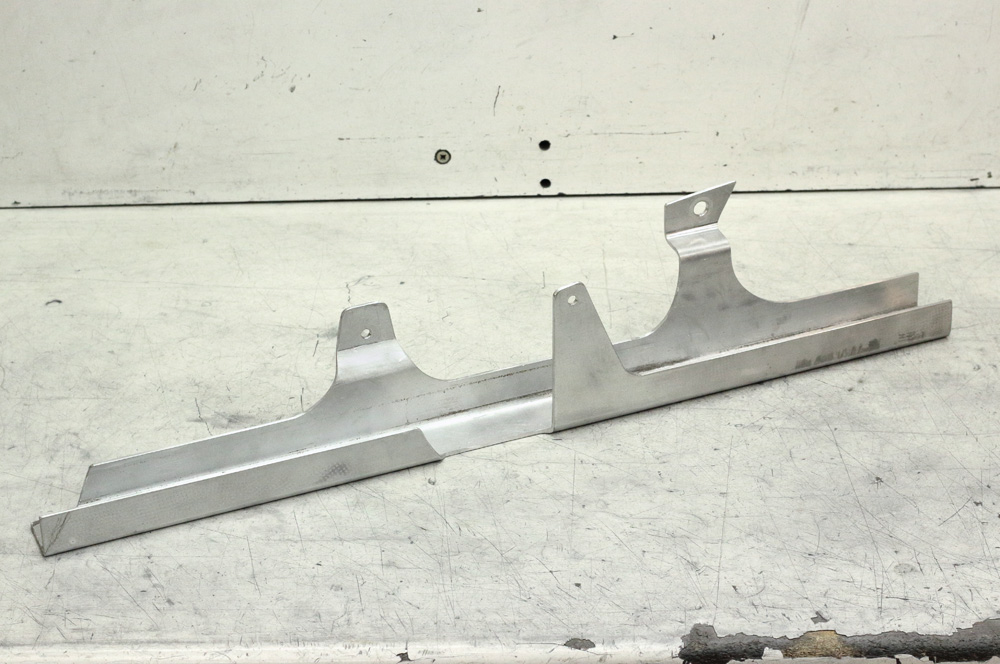
According to my design there would be 41 holes of 14mm diameter: 22 on “face” side and 19 on back, places in straight rows. It’s a bit tricky task, as centering drill bit works poorly with soft aluminum alloy and there is no chance to put part in vices. So it was all good-old-step-by-step drilling. I started with 3mm drill bit and moved up to 13mm drill bit with step in 1mm. From time to time I made measurements and aligned row where it was necessary. To get nice looking round holes I used 13.5mm and 13.8mm drill bits before 14mm drill bit. After drilling was done I made first sandpapering approach. With nowadays Coronavirus restrictions it’s became quite a task to buy proper sandpaper and raw materials. I have a box with some supplies of sandpaper I considered to be not completely worn, and here came a moment to get those sandpaper from the box…
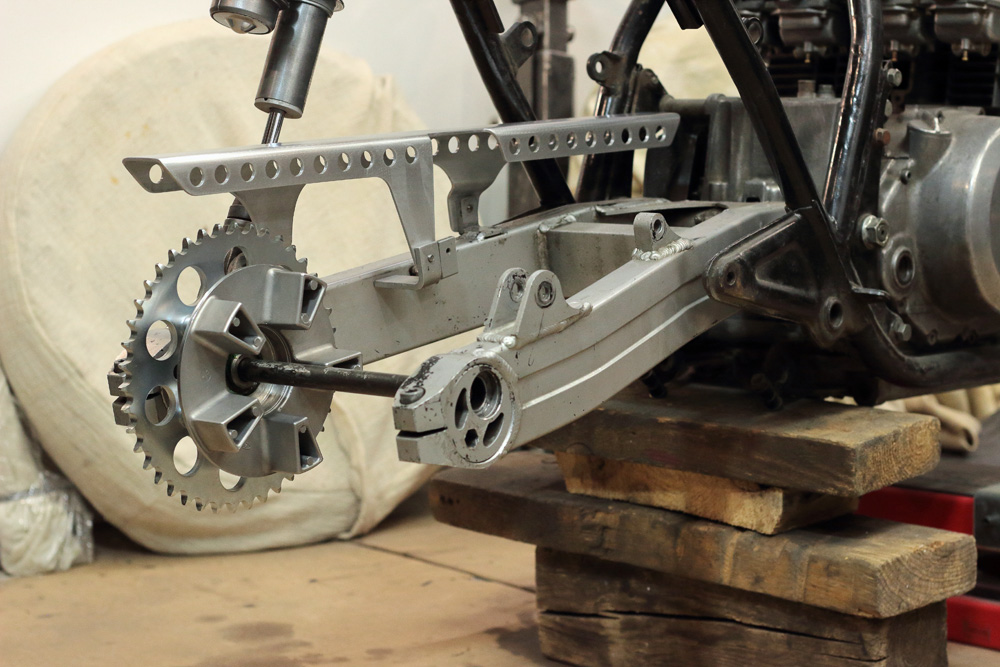
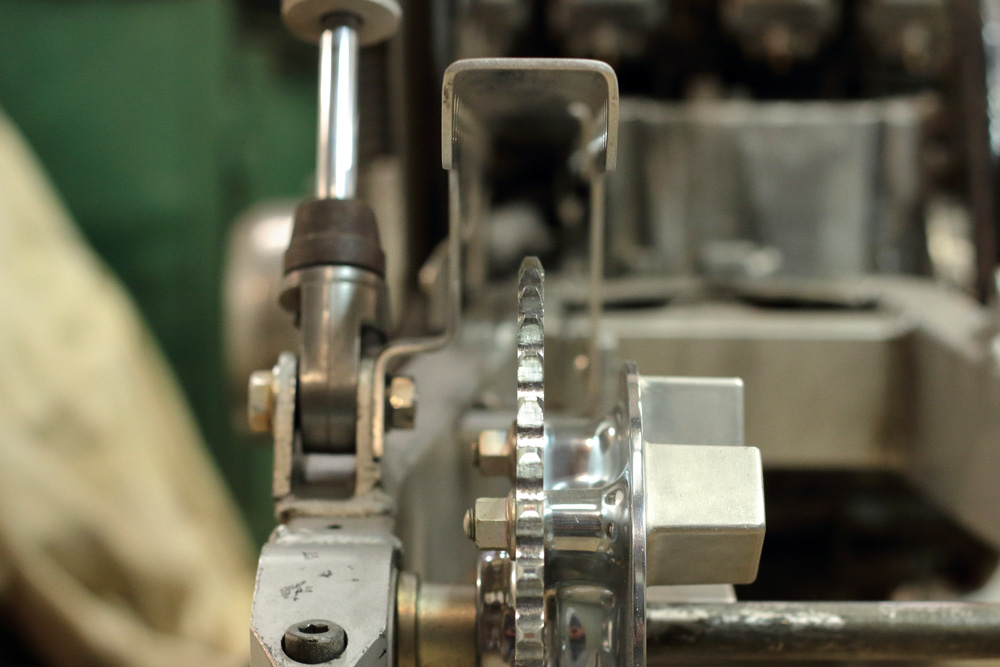
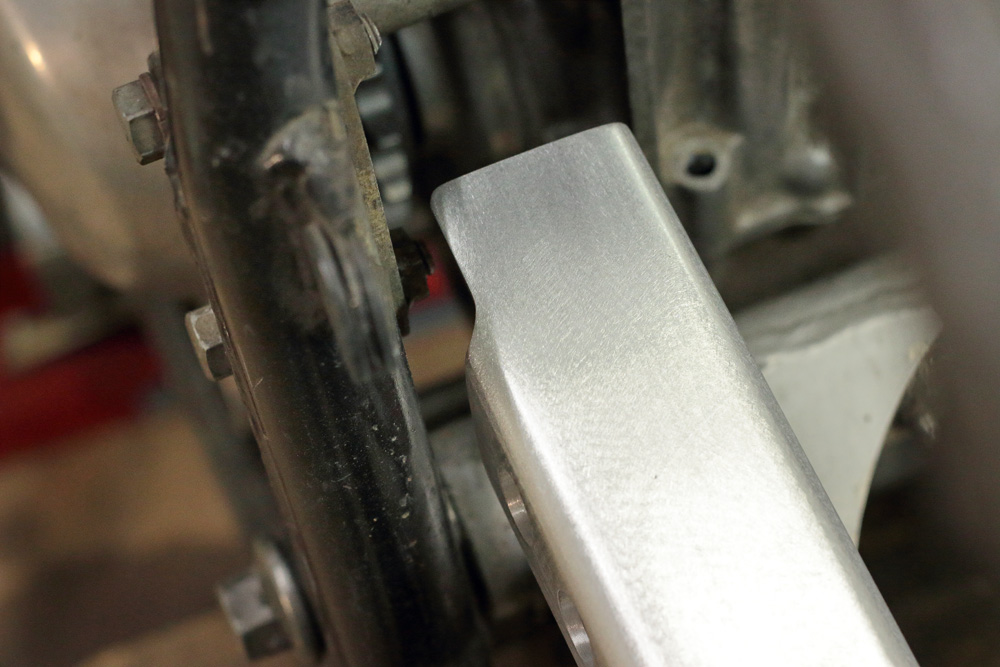
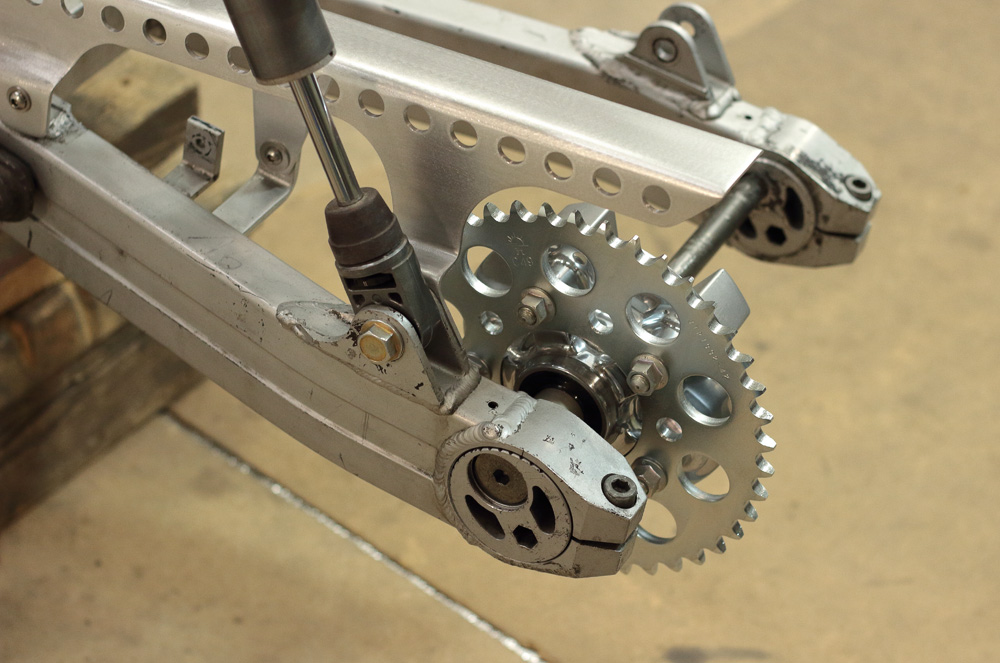
 All gaps were checked previously, but I checked them once more with fully compressed shocks. For this purpose I installed only one shock with spring removed.
 Then I proceeded to further sandpapering, first polishing and final sandpapering. That’s how it looked before polishing :

 P.S. 12.04.2020: Small update.
The aluminum of which I made this chain guard is likely to be 3003 alloy. I made some drilling experiments (different RPMs) with same material and found out that step drill bit works OK for 3030 aluminum on 500RPM with constant oiling. However it does not solve question of aligning (as marking is made not by CNC but man) and it bear another menace: it’s easy to overdrill with it, so it’s better to put some stopper on step next to required.
To be continued.


Step drill bit is normal way for such job.
I have step drill bit of suitable dimensions and sure, I tried it before I came to decision to do the work in old good way. I do believe it’s all about alloys and configuration of drill bits.