
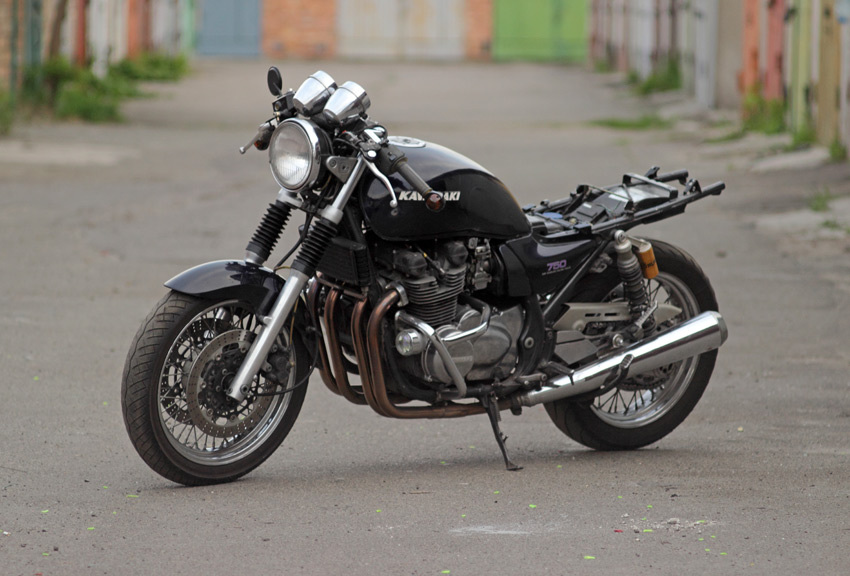
The first stage of Kawasaki Zephyr 750 cafe-racer building is ended so it’s time to show what we have. As I wrote earlier, the point is to make cafe-racer on ZR750 Zephyr base without bike frame cutting. Firstly idea was to leave as many original parts as possible, so after some thoughts I ordered only most necessary parts: clubman bar, gaiters and bar end turn signals. Then I stripped Zephyr, installed all received “cafe” parts and got such view of bike:
 Cafe-racer’s tails are short, as a rule. So in next turn I had to design a tail part in which frame tubes will be shaped tight in purpose of bikes tail length minimization. I made a few different initial cardboard and plastic models of tail; and after choosing development direction I had to make more precise one. So I protected the frame by few layers of stretch film and then used foam plastic and foam spray to have some bulk for modeling. Result of foaming looked like big sheep tail.:-)
 I cut foam as I wanted and got first rough result:
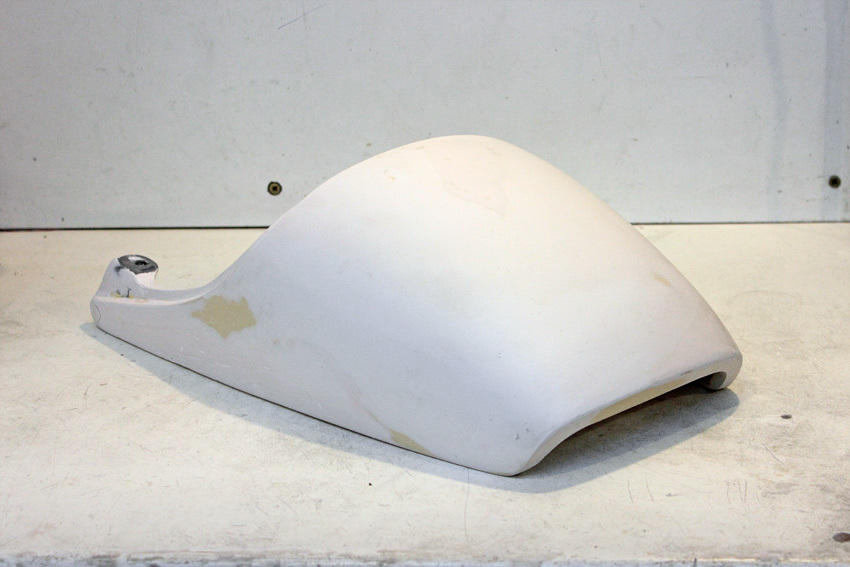
 Then I successively covered foam tail with two component putty and handled it with sand paper until I was pleased by result. That was a long and effortful work.

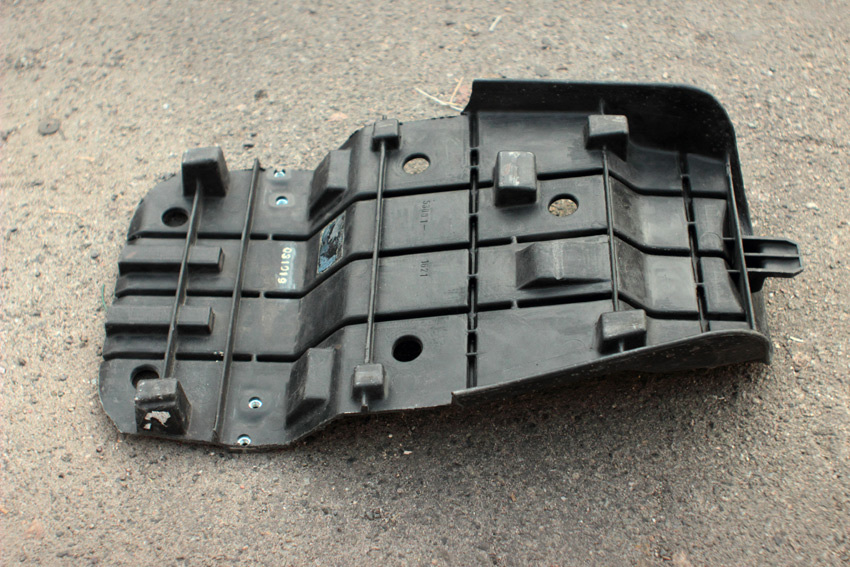
 Next item was seat base applicable to both, standard seat lock and new tail at the same time. I had a spare seat so I decided to modify original base for later using it like template. I cut seat base:
 And soldered new seat base model with using modified an original seat parts and a newly made template one. A little additional adapting of the tail and seat base model was set on its place.
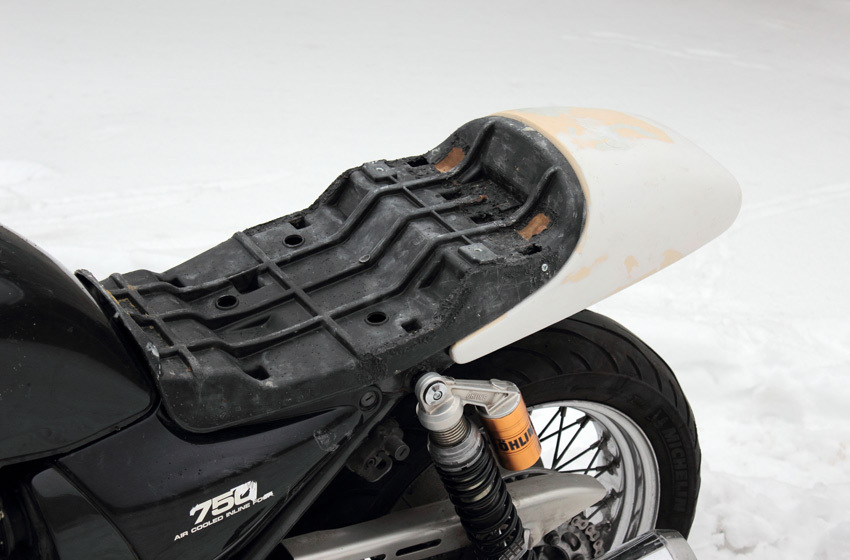 After that I tried to remove tail model for elaboration of all features like mounting ears or stiffeners. With great accuracy I cut out the foam from below of the tail and after few exciting moments I pulled off model from Zephyr frame. Now I could reinforce tail model, made it removable and added all components and features. That was another piece of work but I did it.
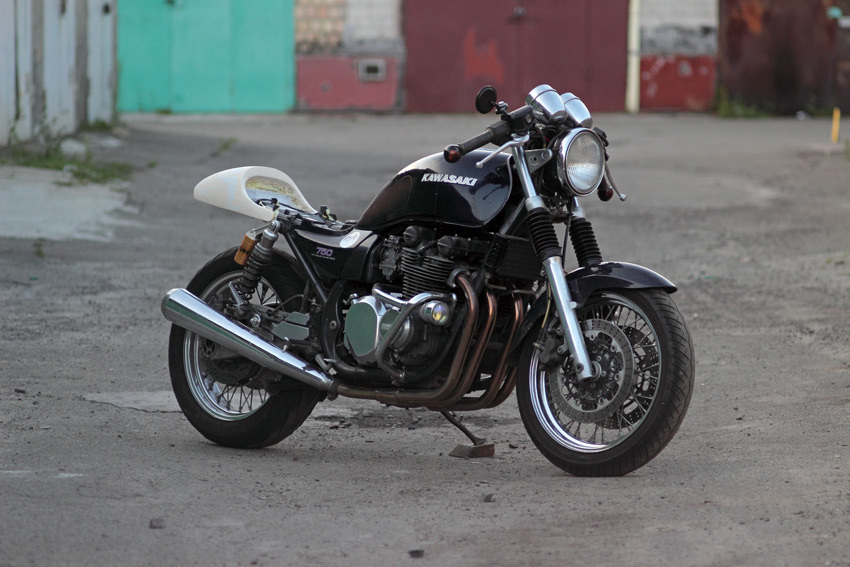
 All left to do with tail was completely smoothened it, finally checked symmetry and then it could be ready for matrix making and so on. But I changed Zephyr 750 cafe-racer kit conception from minimum to maximum edition. I decided to build the bike on which I could place my logo without shame. I had spare Zephyr tank and side covers, so I could design exterior without fear of original parts damage. So I removed front fender, engine guard bars, stock gauges and replaced tank and side covers. I also bought nice small speedometer with led backlight, analog speed indicator and digital mileage display. I found universal headlight mounting bracket in my garage and used it to place the headlight lower then it was before. After all this modification Zephyr looked better, but not enough good, as for me.
 As you can see, I designed potential paint scheme for tank. That was like a flash of lightning in my mind, so all I did – just cut shapes from masking tape.
I also had fractured Zephyr front fender, thus I cut out new shaped fender model right from it.
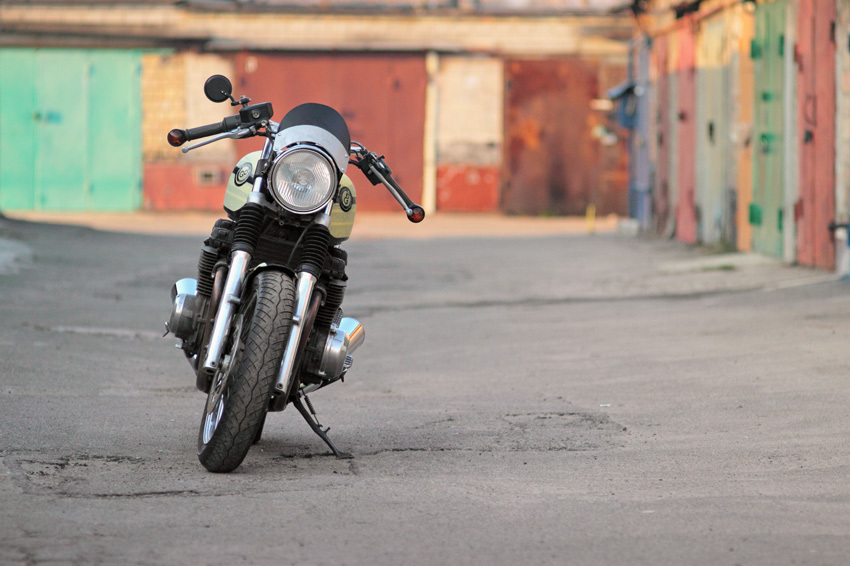
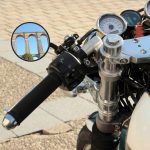
 Earlier, when big stock gauges were on their places I thought about small version of cafe windshield as a way to mask them. I removed gauges, but thoughts about shield still stayed in my mind. That’s why I designed and made windshield model using metal and plastic.
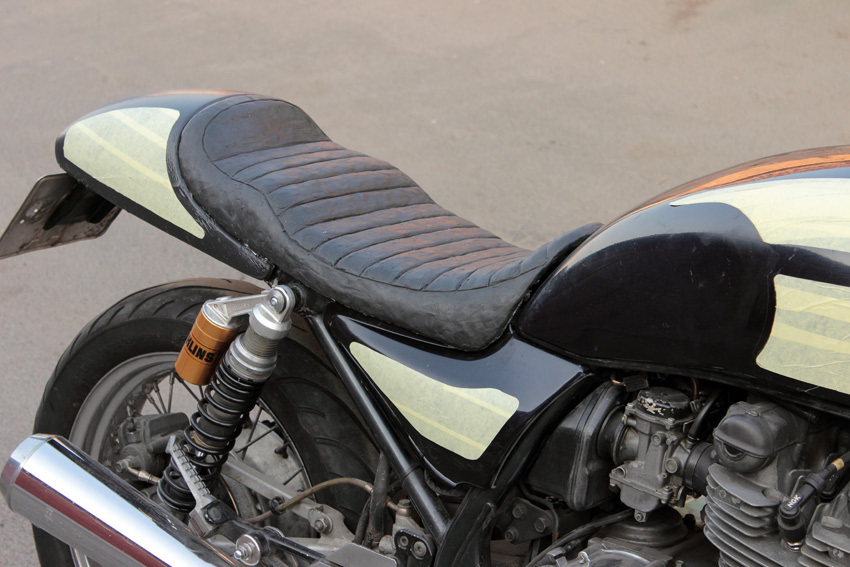
I believe that modeling is an important point in custom bike creation. A model allows you to bring future part dimensions and shapes to perfection. Earlier I used cardboard, plastic, foam plastic, thin metal, plastic bags and so on to model parts, but next my issue became different material. I had to be sure that I could make nice looking seat with existing restriction of seat base and tail dimensions and shapes. And I found that sculpting clay is best material for this purpose. I made seat model with all wished relief and seams and I was satisfied with result completely. As for seat design I want to say: whereas I left passenger foot-pegs, I decided that seat will leave at least a chance for passenger to seat on it:-)
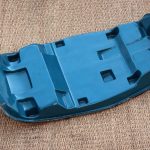
 And last part I needed to model was license plate holder. In fact I developed it quite fast and modeling stage of Zephyr 750 cafe-racer project was mostly completed. I added a painting scheme and got such nice result:

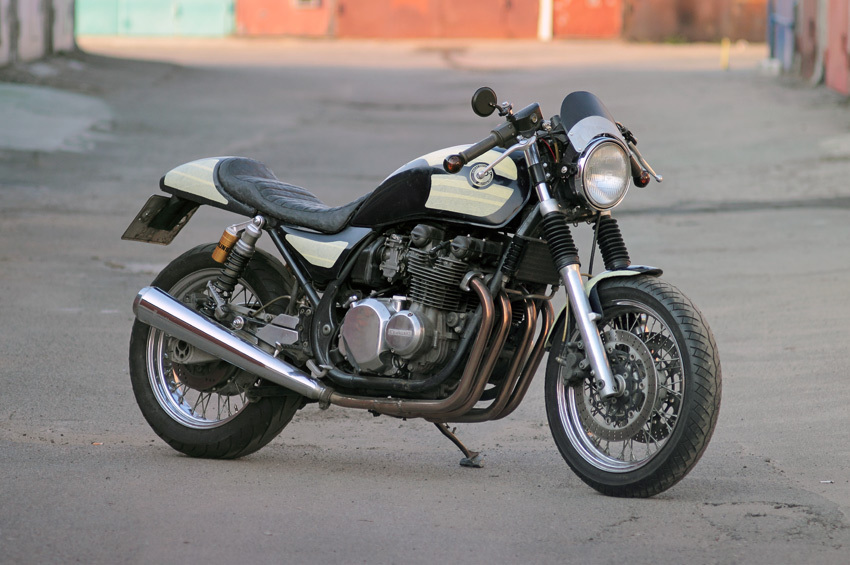

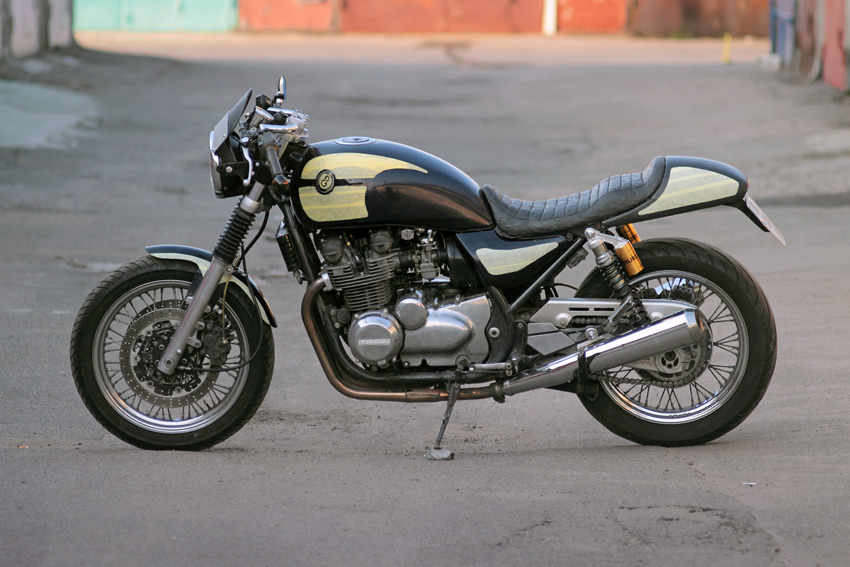
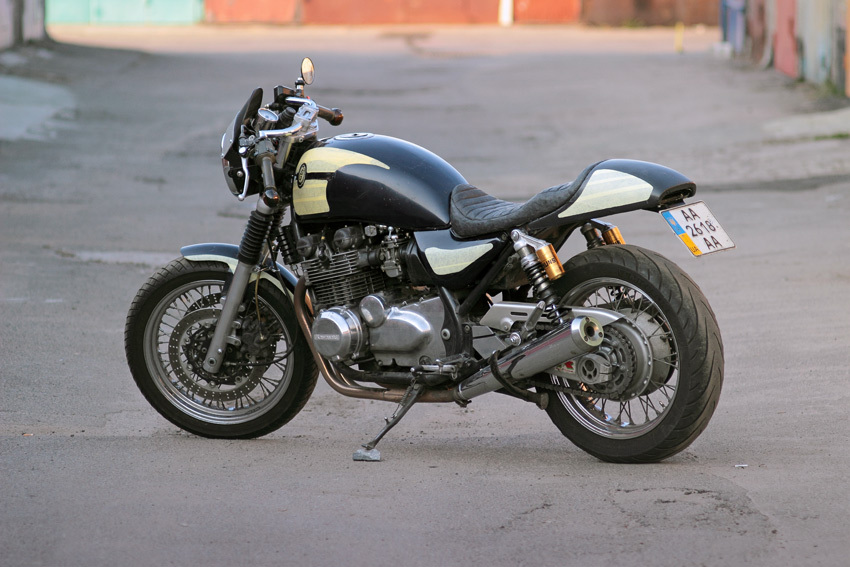
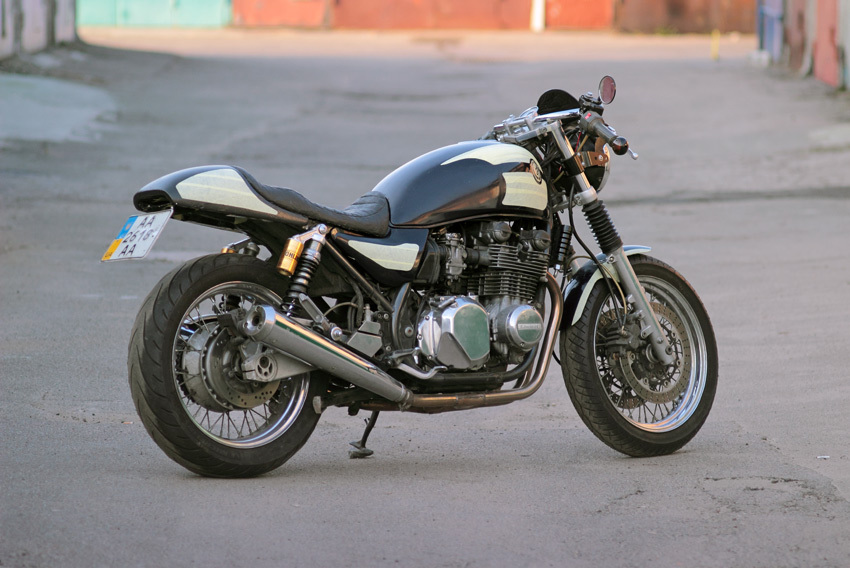
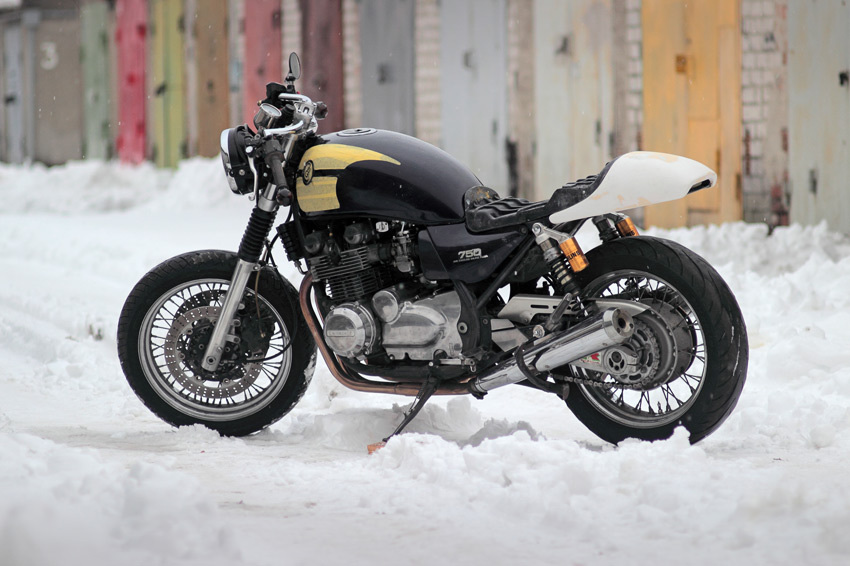
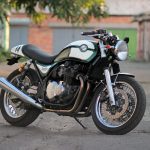
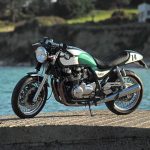
 Yep, painting scheme or some parts may be changed a little, but I think I have completed model of project and I like it. As for future bike color scheme, I think about combination of British racing dark green with white and bronze dividing stripe. To visualize, I photoshoped one of photos a little:
 P.S. Thanks for those of you, who read this from the beginning to the end.
To be continued.

Man,
I have to say this is by far the most exquisite “cafeish” designs I´ve seen on a Zephyr. Great job!
I am about to purchase a zephyr 750, but it is really hard to find one around here (I live in Argentina), and they are really expensive (as all motorcycles here)…around 10K USD…
Once I get one in my hands…I would definitively love to have something done like what you did here.
Do you think there are any chance to get a copy of this tail model you came up with??
Again, great job my friend!!!
Regards,
Thanks a lot for such high score given to my work!
Wow! About prices, I thought that we here in Ukraine have overpriced bikes, but for now I’ll know that I had been mistaken.
And yes I have plans about replicating tail kit in future. But project is still unfinished due to another one, riding, photoshooting and, of course, routine ferial bread earning:-)
I have to say that your café racer is really nice ! I have a zephyr 750 , stock. I didn’t really know how to custom it but you gave a lot of ideas !
Usually, people cut the frame but I didn’t want to .
How did you cut the foam (when it was “sheepy”) ?which tools did you use ?
Can’t wait to see the painting job!
Thanks !
Thanks a lot! Sorry was to busy to answer in time.
I use knife and hacksaw blades for foam cutting.
For my sorrow process is too slow, but I try to do my best.
Hi Gazzz
Congrats with your cafe racer. The result is absolutely beautiful !!
I have a question for you. Are you saying that the front fender is an original Zephyr fender cut down?
I am almost finished with my own 750 Zephyr. (Photo of the bike that I have posted on “Bikepics.com”):
https://www.bikepics.com/pics/2015/09/03/bikepics-2755980-full.jpg
I’m not building a Café racer, but I need a smaller front fender to make it a bit more “hot rod” and to resemble the old Z900 I remember from my youth (- and the only really complaint I have with the original Zephyr design is that “deep” front fender, so I would like to change it anyway.. :o)
I have already bought a used original zephyr front fender and are just about ready to do the cutting. If you have a couple of close-up photos of your front fender, and if I can persuade you to email them to me I would greatly appreciate it. It would be a great guide line for me once I start cutting.
Thanks in advance. BR Niels / Denmark
Hi, Niels, and thanks!
On this photos is original cut down fender, but in final version I used new, metal and custom made.
Great looking bike you made! The very idea of Z900 was a cause of searches and installation of spoked wheels and 4in4 exhaust on my Zephyr. Now my own bike again has view close to stock and I also like Z1 and Z2 colours schemes so I am thinking about painting my motorcycle in same colour scheme as your Zephyr.
About cutting. I had a fender which was broken to pieces so I put it together, then cut off and used only like a model. That’s why I have no photos of this fender. But the only line of cutting, I suppose, is lower edge of chamfer with rounding to lines of fender metal bridge.
I also should admit that now I have the Honda Sabre chrome front fender on my Zephyr. It looks lighter and quite easy could be adapted to be mounted on original fender bridge. Maybe this information also could be useful for you. The photos of this fender you may find here>>